⚡ Ohm's Law Interactive Trainer
Prove V = IR on a breadboard. Swap resistors and watch the voltage drop change in real time — the most important equation in electronics.
Overview
Ohm's Law (V = I × R) is the cornerstone of all electronics. This project creates a live 'lab bench' on your breadboard: swap resistors, measure voltages, and visually confirm the law holds true.
Technical Insight: By using Arduino's 10-bit ADC (analogRead), which measures 0–5V across 1024 steps (≈4.9 mV per step), you can accurately resolve voltage drops across different resistors in a simple series circuit. This is exactly how industrial data-acquisition systems and digital multimeters work.
In simple terms: Connect a known resistor in series with a known supply voltage and a current-limiting resistor. The Arduino reads the voltage across the unknown resistor and calculates: Current (mA) = (V_supply − V_read) / R_known.
What you'll learn: Voltage divider principles, analogRead() for voltage measurement, Ohm's Law verification, series circuit analysis, and unit conversion in code.
Estimated time: 30-45 minutes. Difficulty: ⭐ Beginner-friendly — ideal for physics/electrical students.
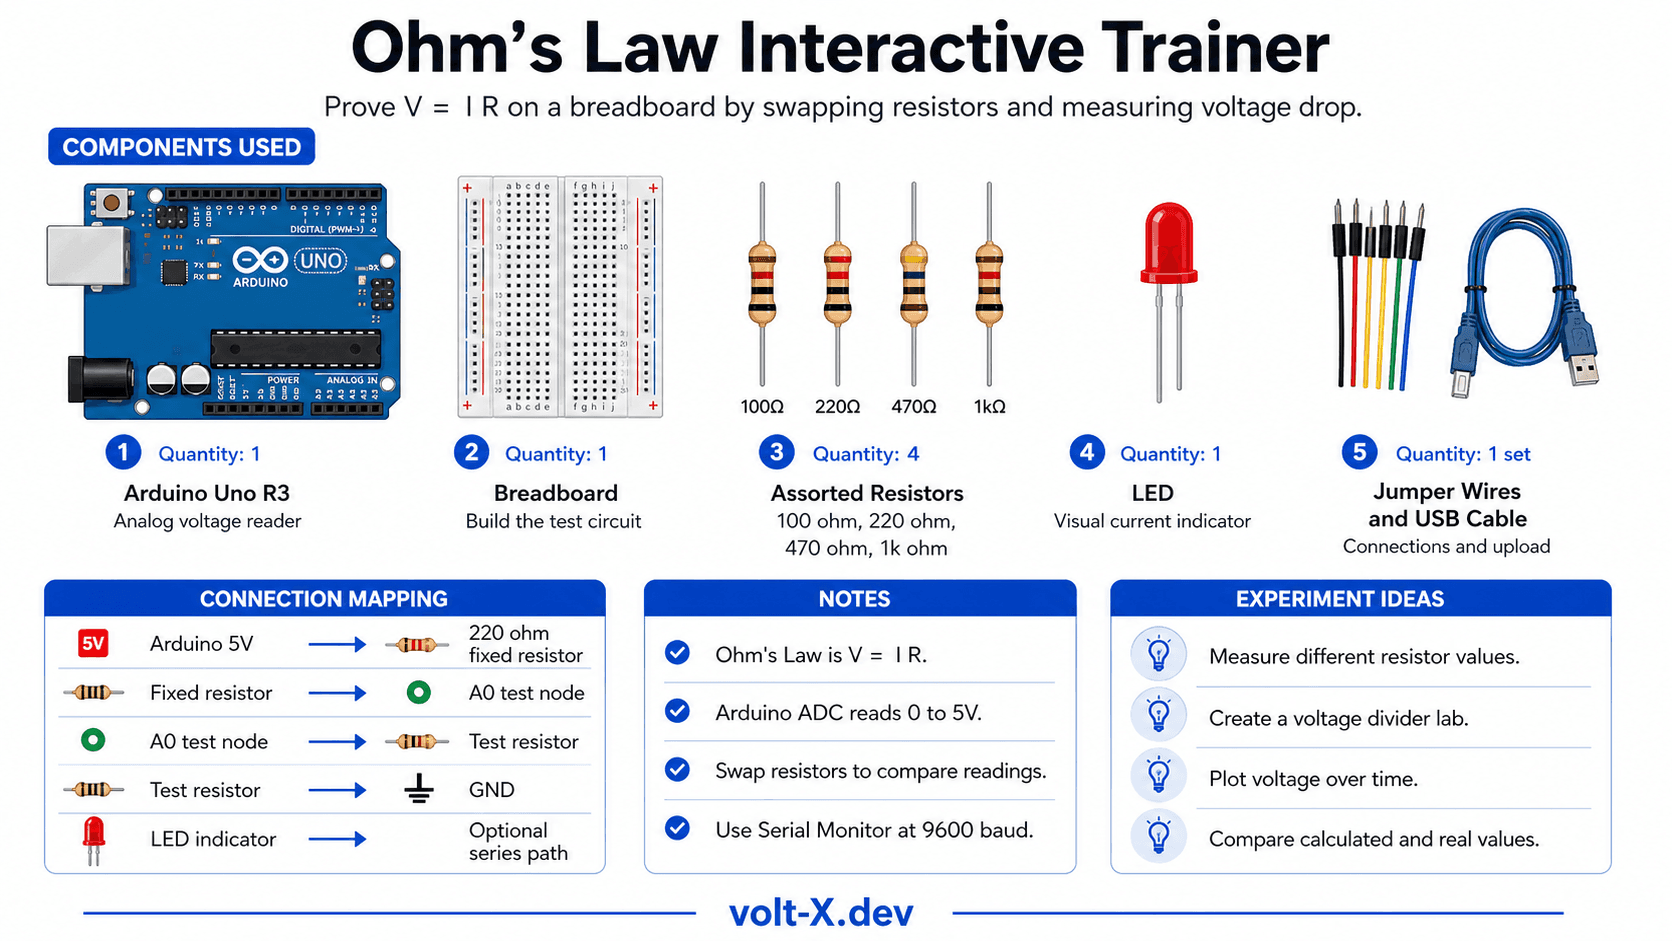
Components Needed
| Component | Specification | Qty | Notes |
|---|---|---|---|
| Arduino Uno R3 | ATmega328P, 5V | 1 | Any Uno-compatible board |
| Resistors (assorted) | 100Ω, 220Ω, 470Ω, 1kΩ | 4 | Swap to see different readings |
| LED | 5mm Red | 1 | Visual current indicator |
| Breadboard + Wires | Half-size | 1 | |
| USB Cable | Type A to B | 1 |
Component Pin Mapping
Step-by-Step Tutorial
Build the Series Circuit
Upload the Code
Open Serial Monitor
9600. You'll see: Voltage (V), Current (mA), and Resistance (Ω) printed every second.Swap Resistors
Record Readings
Arduino Code
// Ohm's Law Trainer — Volt X
// Circuit: 5V --> 220Ω (fixed) --> A0 --> Test Resistor --> GND

const float SUPPLY_V = 5.0;     // Supply voltage (adjust if needed)
const float FIXED_R = 220.0;    // Known series resistor in Ohms
const int   SENSE_PIN = A0;     // Voltage divider midpoint

void setup() {
  Serial.begin(9600);
  Serial.println("=== Ohm's Law Trainer — Volt X ===");
  Serial.println("Swap the test resistor and observe changes!");
  Serial.println("V(drop) | Current | Test Resistance");
}

void loop() {
  int raw = analogRead(SENSE_PIN);
  float v_test = raw * (SUPPLY_V / 1023.0); // Voltage across test resistor
  float v_fixed = SUPPLY_V - v_test;        // Voltage across fixed resistor
  float current_mA = (v_fixed / FIXED_R) * 1000.0; // I = V/R in mA
  float r_test = (current_mA > 0) ? (v_test / (current_mA / 1000.0)) : 0;

  Serial.print(v_test, 3); Serial.print(" V  |  ");
  Serial.print(current_mA, 2); Serial.print(" mA  |  ");
  Serial.print(r_test, 1); Serial.println(" Ohm");
delay(1000);Reviews & Ratings
Sign in to leave a review
Loading reviews...