🎮 IR Remote Control Receiver
Hack any TV remote to control your Arduino projects from a distance using an IR receiver.
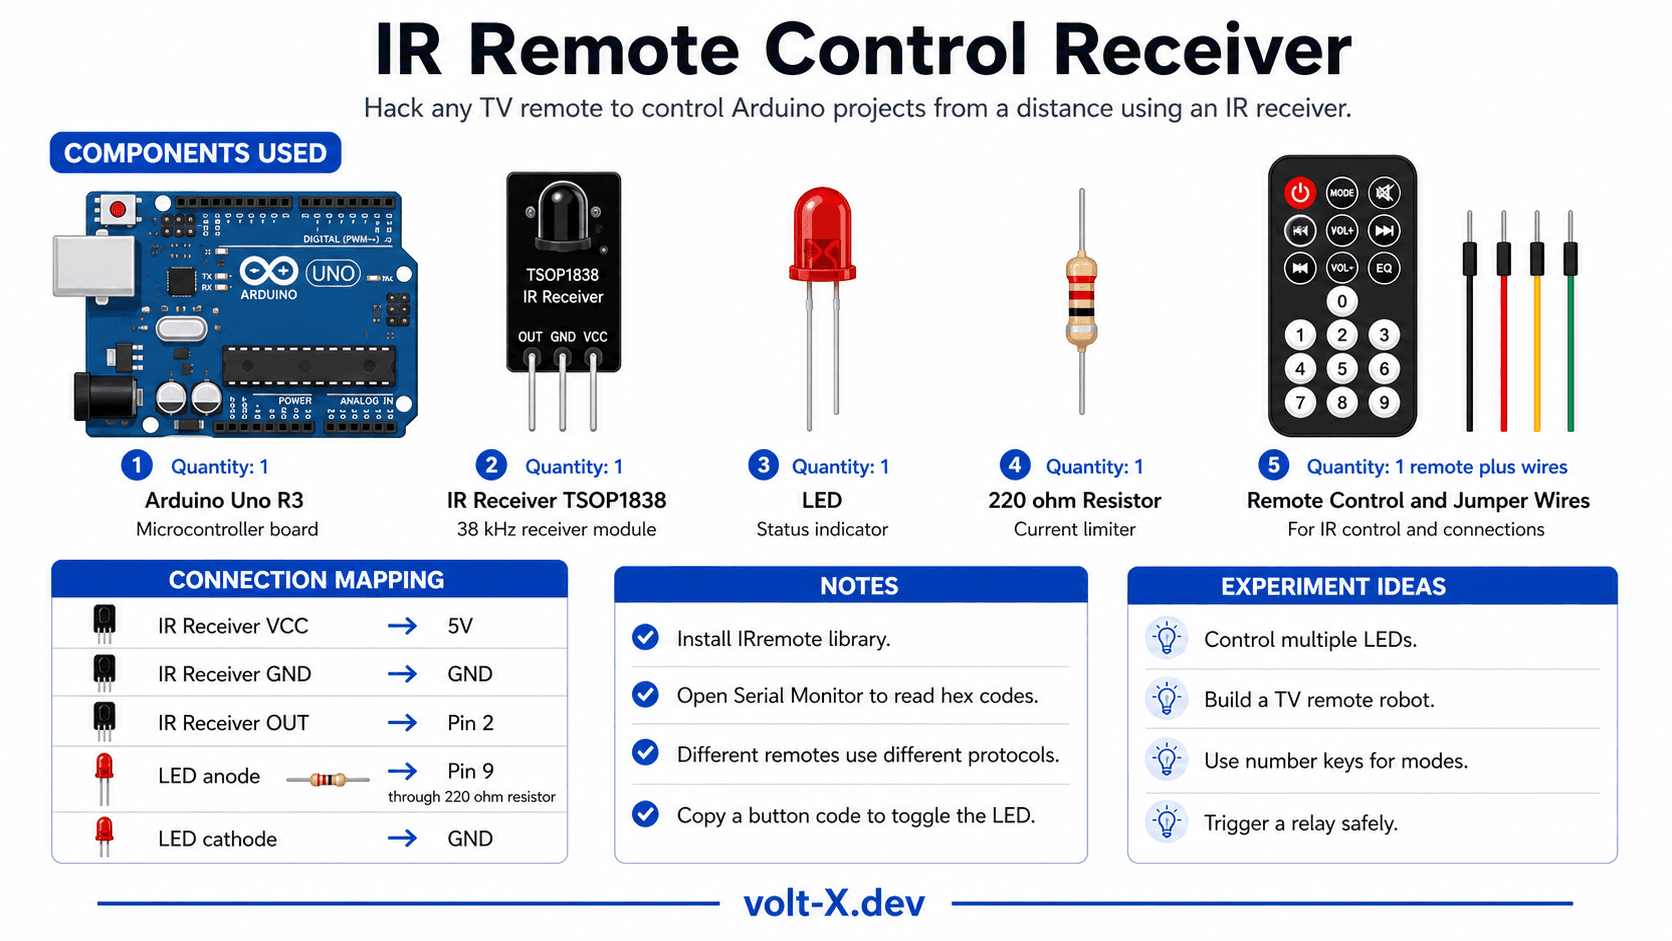
Overview
Infrared remotes send data by flashing an IR LED at 38kHz. The IR receiver (like TSOP382) decodes these flashes into binary codes that Arduino can understand.
What you'll learn: IR communication, IRremote library, hex code decoding, and remote control logic.
Estimated time: 45-60 minutes. Difficulty: ⭐⭐⭐ Intermediate.
Components Needed
| Component | Specification | Qty | Notes |
|---|---|---|---|
| Arduino Uno R3 | 5V | 1 | |
| IR Receiver | TSOP1838 or similar | 1 | 3-pin module |
| LED | Status indicator | 1 | |
| Resistor | 220Ohm | 1 | |
| Remote Control | Any TV/DVD remote | 1 |
Component Pin Mapping
Step-by-Step Tutorial
1
Install Library
Search for
IRremote by Armin Joachimsmeyer in the Library Manager and install it.2
Wire Receiver
VCC → 5V, GND → GND, OUT → Pin 2.
3
Find Button Codes
Upload the code and open Serial Monitor. Press a button on your remote — its unique hex code will appear.
4
Customize
Copy the hex code for a button and use it in a switch-case to toggle an LED.
Different remotes use different protocols (NEC, Sony, Samsung). The IRremote library automatically detects the protocol, so you only need to focus on the Hex values.
Arduino Code
ir_remote.ino
INO
// IR Remote Receiver : Volt X
#include <IRremote.h>

const int RECV_PIN = 2;
const int LED_PIN = 13;

void setup() {
  Serial.begin(9600);
  IrReceiver.begin(RECV_PIN, ENABLE_LED_FEEDBACK);
  pinMode(LED_PIN, OUTPUT);
}

void loop() {
  if (IrReceiver.decode()) {
    Serial.println(IrReceiver.decodedIRData.decodedRawData, HEX);

    // Replace with YOUR remote's hex code
    if (IrReceiver.decodedIRData.decodedRawData == 0xE916FF00) {
      digitalWrite(LED_PIN, !digitalRead(LED_PIN));
    }

    IrReceiver.resume();
  }
}Reviews & Ratings
—0 reviews
Sign in to leave a review
Loading reviews...