🌊 Water Level Indicator
Build a simple water depth sensor using three probes and multi-level LED indicators.
Overview
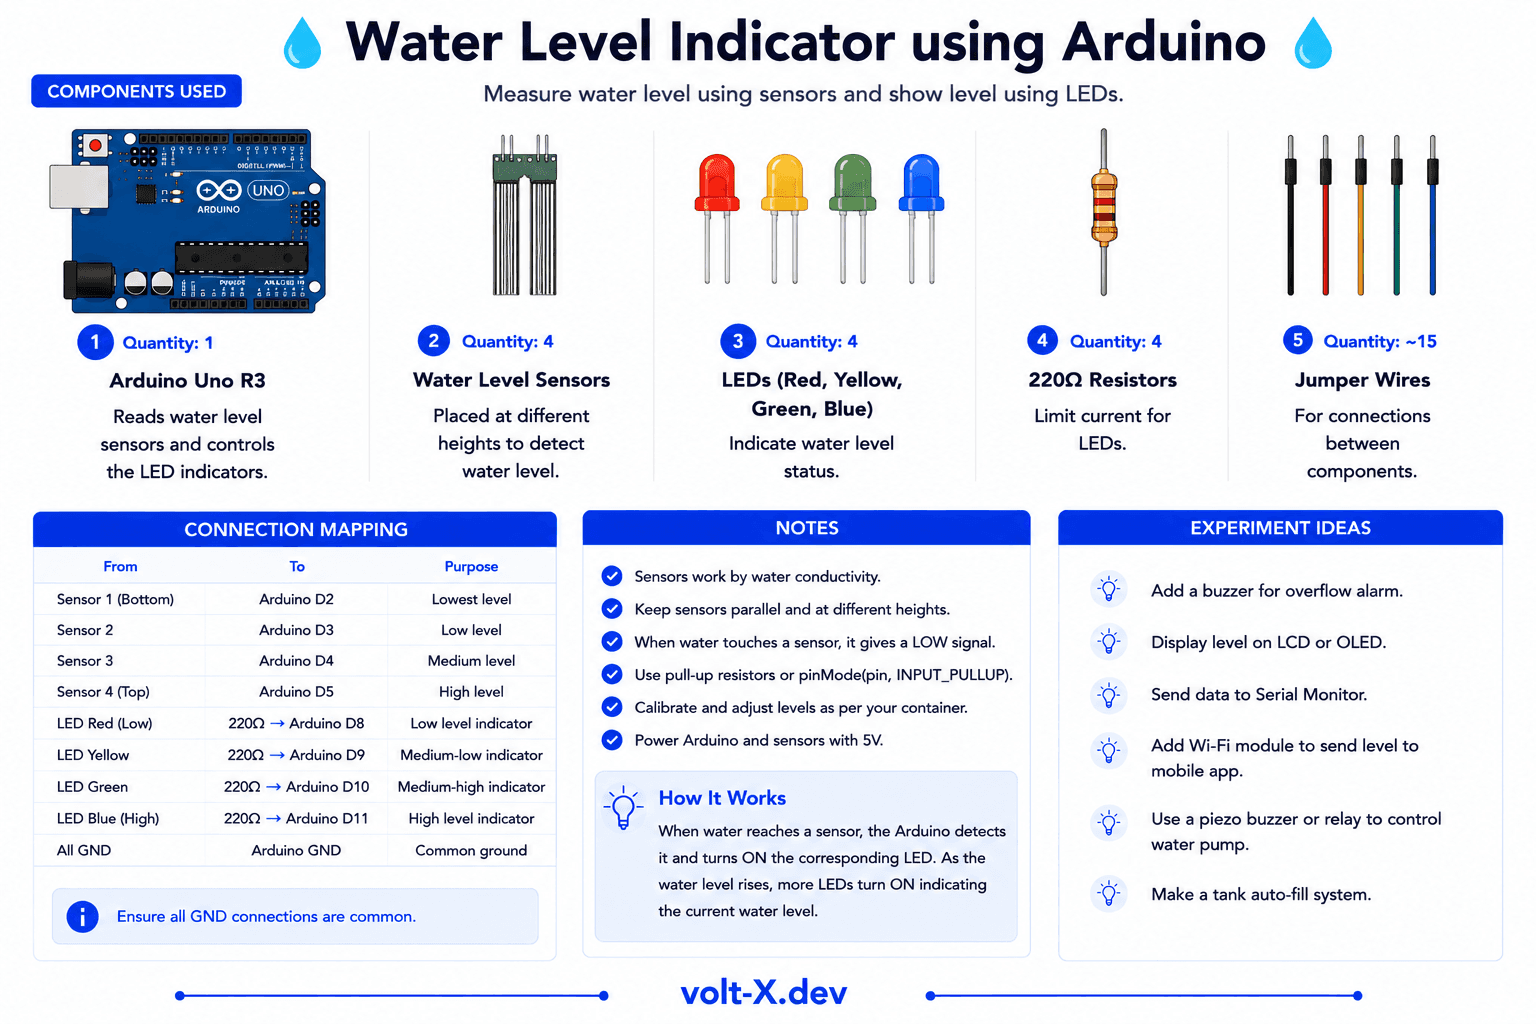
Water conducts electricity. By placing wires at different heights in a container, we can detect which ones are submerged as they complete a circuit to a common 5V probe.
What you'll learn: Digital logic for sensing, simple conductivity probes, and multi-threshold display.
Estimated time: 40-50 minutes. Difficulty: ⭐⭐ Easy.
Components Needed
| Component | Specification | Qty | Notes |
|---|---|---|---|
| Arduino Uno R3 | 5V | 1 | |
| LEDs (R, Y, G) | 3 levels | 3 | |
| Resistors | 220Ohm | 3 | |
| Resistors | 10kOhm | 3 | Pull-down for probes |
| Stiff Wire Probes | Copper or Steel | 4 | 1 common, 3 level probes |
Component Pin Mapping
Step-by-Step Tutorial
1
Prepare Probes
Cut 4 wires of different lengths. One long wire (Common) goes to the bottom. Others (Low, Med, High) stop at different levels.
2
Wire Pull-downs
Connect each level probe (Pin 2, 3, 4) to GND via 10kOhm resistors.
3
Connect Common
Connect the longest wire directly to 5V.
4
Test in Water
Slowly fill a cup. LEDs will light up one by one as the water hits each wire.
For real-world use, use stainless steel probes to prevent corrosion. For a breadboard project, simple jumper wires work fine for a quick demo.
Arduino Code
water_level.ino
INO
// Water Level Indicator : Volt X
const int L1=2, L2=3, L3=4; // Probes
const int G=8, Y=9, R=10;   // LEDs

void setup() {
  pinMode(L1, INPUT); pinMode(L2, INPUT); pinMode(L3, INPUT);
  pinMode(G, OUTPUT); pinMode(Y, OUTPUT); pinMode(R, OUTPUT);
}

void loop() {
  if(digitalRead(L3)) digitalWrite(R, HIGH); else digitalWrite(R, LOW);
  if(digitalRead(L2)) digitalWrite(Y, HIGH); else digitalWrite(Y, LOW);
  if(digitalRead(L1)) digitalWrite(G, HIGH); else digitalWrite(G, LOW);
  delay(200);
}Reviews & Ratings
—0 reviews
Sign in to leave a review
Loading reviews...