🌓 Potentiometer LED Dimmer
Control LED brightness smoothly by mapping analog input from a potentiometer to PWM output.
Overview
Arduino can't output a variable voltage, but it can simulate it using PWM (Pulse Width Modulation). By pulsing an LED on/off very fast, we can control its apparent brightness.
What you'll learn: analogRead(), analogWrite(), map() function, and PWM fundamentals.
Estimated time: 20-30 minutes. Difficulty: ⭐ Beginner-friendly.
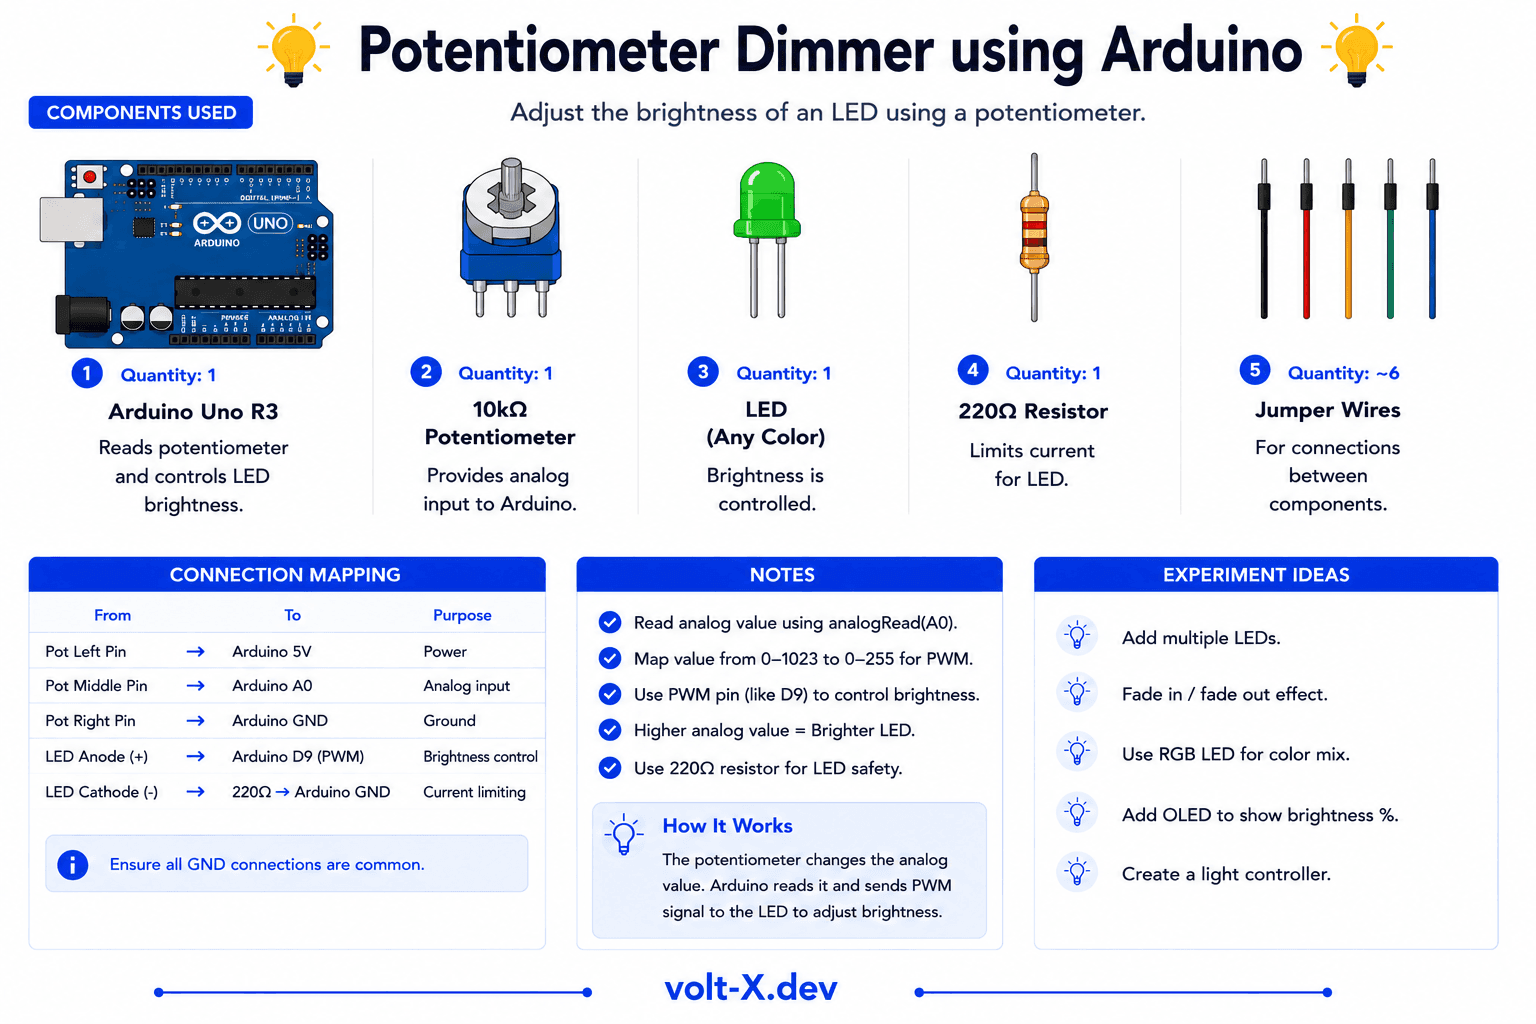
Components Needed
| Component | Specification | Qty | Notes |
|---|---|---|---|
| Arduino Uno R3 | 5V | 1 | |
| Potentiometer | 10kOhm Linear | 1 | B10K |
| LED | 5mm | 1 | |
| Resistor | 220Ohm | 1 | |
| Breadboard + Wires | Half-size | 1 |
Component Pin Mapping
Step-by-Step Tutorial
1
Wire the Potentiometer
Outer pins to 5V and GND, center pin to analog pin A0.
2
Wire the LED
Anode to digital pin 9 (PWM) via 220Ohm resistor, cathode to GND.
3
Upload Code
The
map() function scales 0-1023 input to 0-255 output.4
Rotate and Observe
Turn the knob. The LED will fade from completely off to full brightness.
Only pins with the ~ symbol (3, 5, 6, 9, 10, 11) support PWM on the Uno. Using a non-PWM pin will only result in the LED being either fully ON or fully OFF.
Arduino Code
pot_dimmer.ino
INO
// Potentiometer Dimmer : Volt X
const int potPin = A0;
const int ledPin = 9; // Must be PWM pin

void setup() {
  pinMode(ledPin, OUTPUT);
}

void loop() {
  int val = analogRead(potPin);
  // Map 0-1023 (analog) to 0-255 (PWM)
  int brightness = map(val, 0, 1023, 0, 255);
  analogWrite(ledPin, brightness);
  delay(10);
}Reviews & Ratings
—0 reviews
Sign in to leave a review
Loading reviews...