🎵 Buzzer Piano Keyboard
Turn 7 push buttons into a playable piano. Map frequencies to musical notes on your breadboard.
Overview
Sound is just vibration at a specific frequency. The Arduino's tone() function can drive a piezo buzzer at any frequency, making it a perfect musical instrument controller.
What you'll learn: tone() and noTone() functions, frequency-to-note mapping, button arrays, and for-loop scanning.
Estimated time: 40–50 minutes. Difficulty: ⭐⭐ Easy.
Components Needed
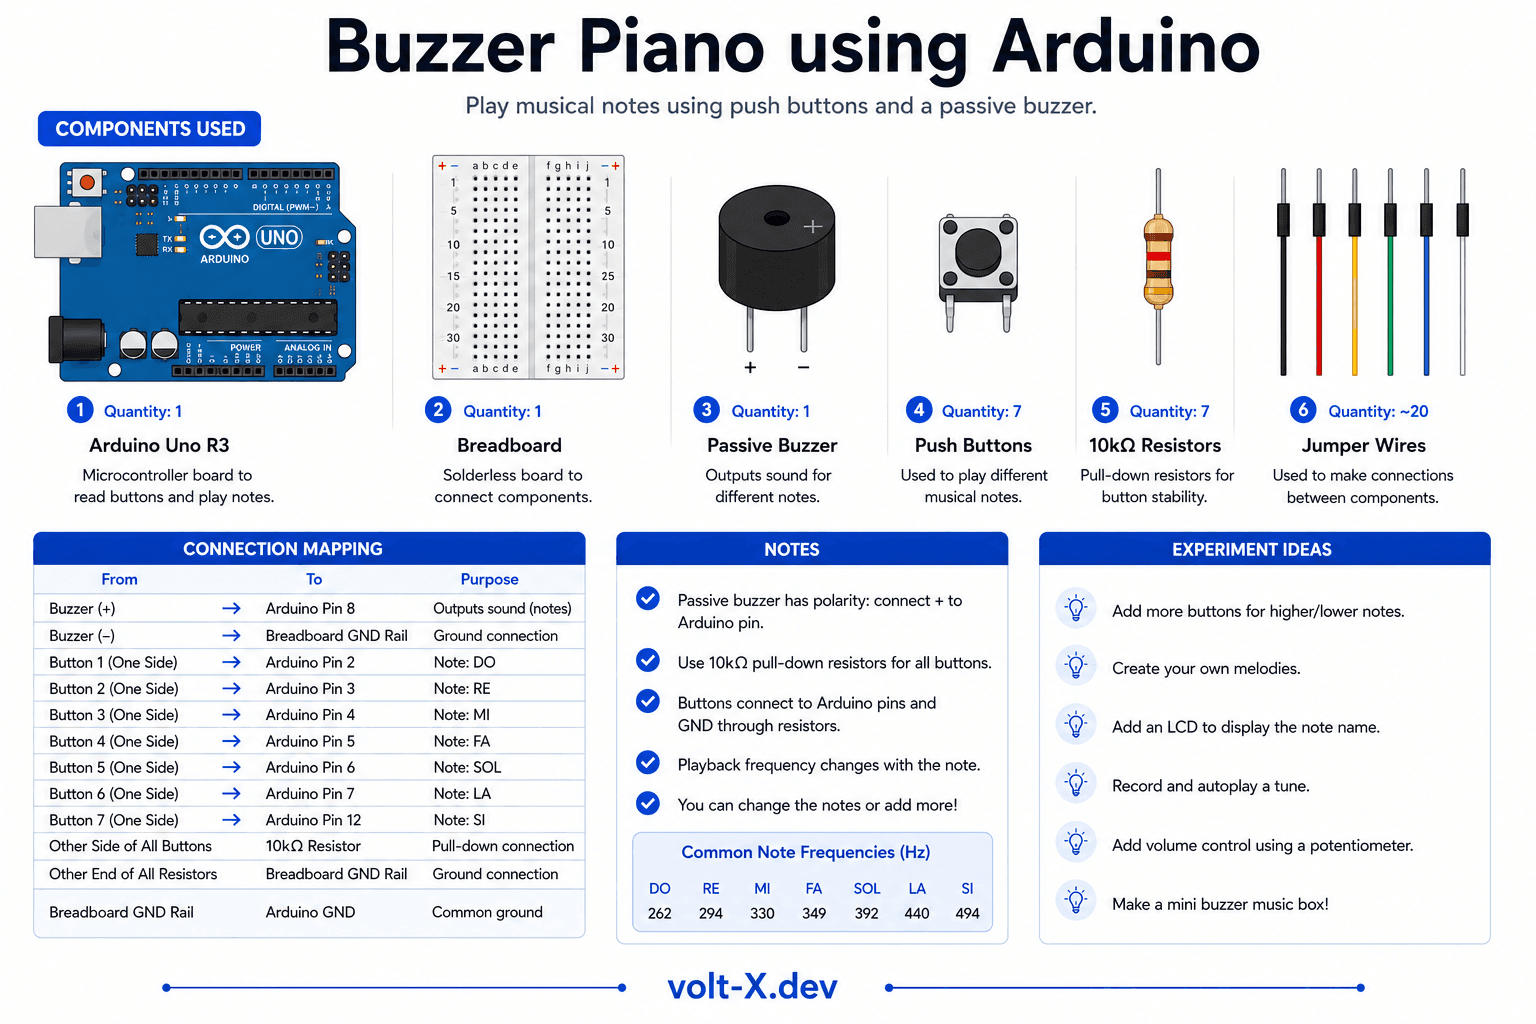
| Component | Specification | Qty | Notes |
|---|---|---|---|
| Arduino Uno R3 | 5V | 1 | |
| Piezo Buzzer | Active/Passive 5V | 1 | Passive buzzer recommended |
| Push Buttons | Momentary SPST | 7 | One per note (C-D-E-F-G-A-B) |
| Resistors | 10k Ohm pull-down | 7 | One per button |
| Breadboard + Wires | Full-size | 1 |
Component Pin Mapping
Step-by-Step Tutorial
1
Place the Buttons
Insert 7 buttons in a row on the breadboard, spanning the center gap.
2
Wire Pull-Down Resistors
Connect 10k Ohm from each button output to GND.
3
Connect Buttons to Arduino
Button 1 -> Pin 2, Button 2 -> Pin 3 ... Button 7 -> Pin 8.
4
Wire the Buzzer
Connect buzzer positive to pin 9, negative to GND.
5
Play!
Upload and press buttons. Each plays a musical note -> try playing "Twinkle Twinkle Little Star"!
Use a passive buzzer (not active) — active buzzers have built-in oscillators and always play the same pitch regardless of frequency.
Arduino Code
buzzer_piano.ino
INO
// Buzzer Piano — Volt X
const int buzzer = 9;
const int buttons[] = {2, 3, 4, 5, 6, 7, 8};
const int notes[] = {262, 294, 330, 349, 392, 440, 494}; // C D E F G A B

void setup() {
  for (int i = 0; i < 7; i++) {
    pinMode(buttons[i], INPUT);
  }
  pinMode(buzzer, OUTPUT);
}

void loop() {
  bool anyPressed = false;
  for (int i = 0; i < 7; i++) {
    if (digitalRead(buttons[i]) == HIGH) {
      tone(buzzer, notes[i]);
      anyPressed = true;
      break;
    }
  }
  if (!anyPressed) noTone(buzzer);
}Reviews & Ratings
—0 reviews
Sign in to leave a review
Loading reviews...